By: Elizabeth Zimmermann
Source: The Opinionated Knitter, Knitting w/o Tears, and Knitting Workshop
Materials: Beaverslide Fisherman-Weight McTaggart Tweed
Amount: 8 skeins in 'Mountain Mahogany'; 1 partial skein in 'Autumn Dogwood'
Needles: 5.0mm/US8 Addi Turbos
Start Date: 29 May 2007
Finish Date: 25 June 2007
(Buttons added July 3, 2007)
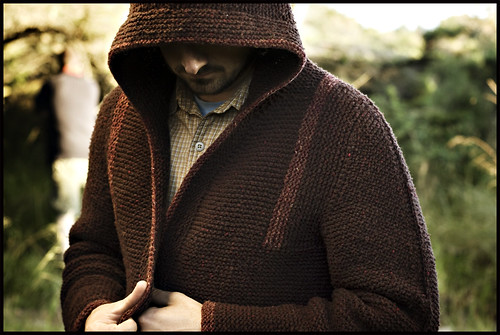
First things first, a little background info on the Tomten. Elizabeth conceived and knit the first Tomten Jacket for her infant son in 1940. The pattern as we know it (more or less) was released in 1961 in Elizabeth's 7th newsletter (reprinted with the rest of the collection in The Opinionated Knitter). The pattern has taken on variations over the years from both Elizabeth and Meg and made its way into two more classic publications: Knitting Without Tears, and Knitting Workshop. Tomten, the jacket's namesake, is a small Swedish elf who specializes in good deeds. According to Elizabeth, "your child will resemble him strangely, if you put a Tomten jacket on him or her." What do you think? Is it Elf-ish enough for you?
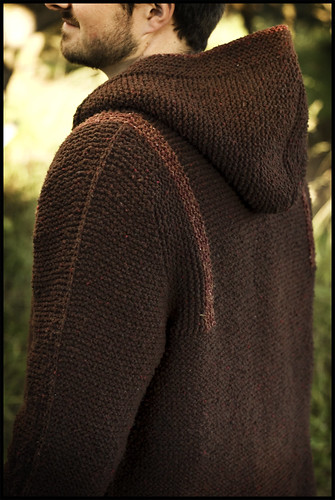
Modifications: Although EZ provides 'sizing' for an adult version - it's basically the same pattern worked in Sheepsdown, her superbulky weight wool (2-3sts/in). Despite wanting to knit a jacket in something a bit lighter than Sheepdown (I worked with fisherman weight wool), I knew I wanted to make some pretty major changes to the pattern to fit the proportions and shapes of an adult.
Elizabeth's pattern is a modular piece (she's nothing if not clever) - all numbers both vertical and horizontal are divisible by 4. This makes for intuitive and logical knitting... but also for a sort of boxy fit (great for the little ones!). Especially where armhole depth is concerned. Early on I decided to more or less throw the magic number out the window and knit to my measurements. Although I did choose to keep the signature 'quarters' for armholes and body/neck opening (detailed below), after all - it wouldn't be a Tomten without those.
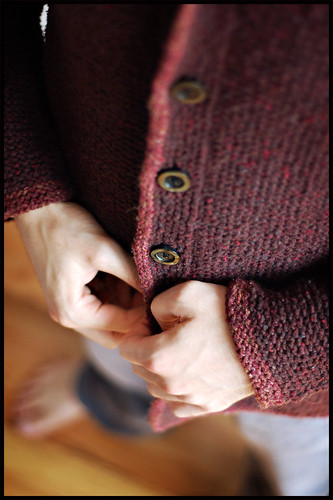
The Tomten has DEEP armholes. When you reach the underarms, you basically divide the sweater into quarters: one quarter each for the armholes, leaving half of the sweater's stitches left over the middle for working front and back of the body. After working body fronts and back to desired armhole depth, you join them again into the round and work straight on to form that wonderful hood. While the construction is rather genius, you may notice that it leaves quite a ginormous neck opening. Half of your body circumference to be exact. And a 21" neck opening was just a tad much for me. Lets not even imagine the cavernous neck-openings on a men's XL.
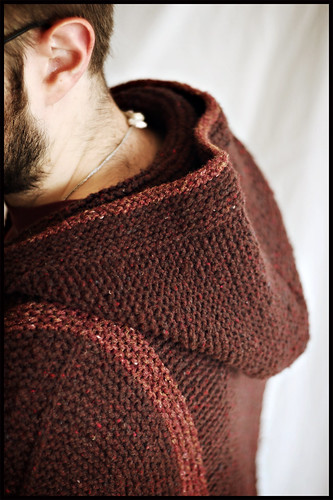
Neck Opening & Hood Mods: To address the neck opening issue and prepare for a nice smooth hood transition I did a few things. First, I threw in some v-neck shaping about 6 inches before shoulder tops. Since I was planning a wide button band to encircle the entire outer length of the hood and body, a v-neck seemed the smartest way of smoothly feeding the band onto the hood with ease. And no mitering or lumpy corners! Next, to give it a bit of structure I added two short shoulder seams at the top - this was also a way of shaving off excess width at the neck. On either side of body front and back, instead of joining the whole thing into the round, I did a 3 needle bind off over 10 stitches on either side (5 sts from front, 5 sts from back). This alone took away 20 stitches from the neck opening which for me was 5 inches. That landed me right around my target neck opening of about 16". To add a bit more sturdiness I chose to bind off at the neck as you would a regular pullover, rather than knitting directly the live neck opening stitches to form the hood. This creates a less stretchy neck opening. Combined with the small shoulder seams (3 needle bind-off makes a nice strong seam, even over 10 measly stitches) the structure at the shoulders and neck made something much more wearable, and durable to boot.
To make the hood then, I picked up stitches from the bound-off neck. I wanted a less trunk-ish hood that sort of hugged the neck a bit in the back. The first time I tried the hood I followed the pattern, increasing evenly over the first 14 rows until desired depth. After I finished it, however, I really didn't like it. Still too wide at the base, even despite the neck decreases employed earlier. I ripped it and made some modifications to the second version that I like very much. The most important was a sharp decrease across the back of the hood about a half inch after picking up neck stitches. I really wanted it to fit the contour of an actual human neck, so pulling it in just above the shoulders worked like a charm. After three rows of garter, I decreased 10 stitches evenly across the back half of the hood in one row. With my new counts I worked even for about 4-5 inches before beginning the hood increases (I just measured my neck and head to see when to start increasing.) When I worked to my desired hood depth (about 13.5"), I short rowed the last 3 rows to curve the top point just a bit. In the end, I was really glad I ripped and re-knit (aren't we always!?) because the 2nd hood fits great. Oh - and instead of a three-needle bind off, I did a garter stitch graft to join the top of the hood - you can't even tell there's a seam there! I love that graft.
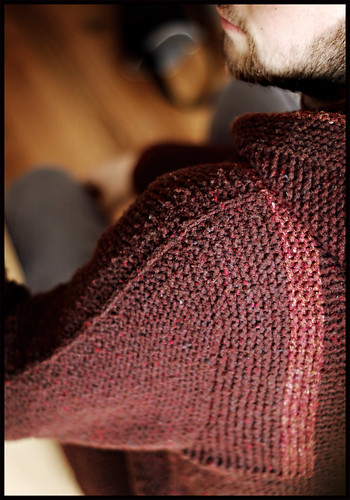
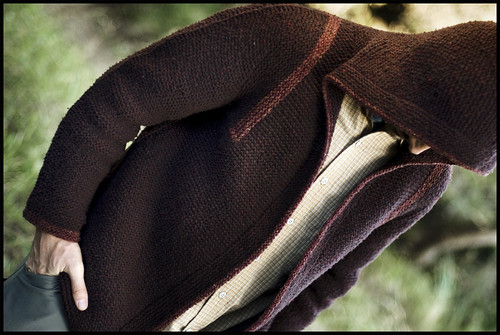
Armhole & Sleeve Mods: The armhole and sleeve cap modification is probably the most major change I made to the pattern. I explained in some detail the process here, if you'd like to review. Basically, I worked the deep armholes back and forth until I was about two-inches from consuming all armhole stitches (more or less I left underarm stitches to equal 8% of body circumference on a holder while working the sleeve caps, following a standard EPS seamless). I then began working a top-down set-in sleeve a la Barbara Walker in her masterpiece, starting with a third of the armhole stitches and working short rows back and forth, consuming an additional armhole stitch at the end of each row. It's really a genius little technique - I'm happy I got another chance to work it here. Of course because of the unique row gauge of garter stitch, I had to employ a decreasing scheme to work whilst doing the short rows on the cap. It was a bit like a knitting circus act, but in the end it worked out perfect. I'm really happy with how they fit. The picture above gives a nice little visual to the construction
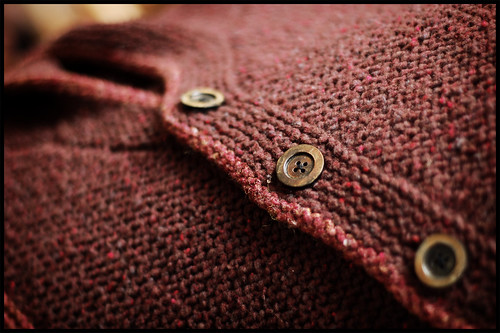
Details and Trimmings: The buttons called to me - so I ignored their price tag. They're medium sized horn carved buttons, a deep warmish brown with lighter brown marbling. I'm really happy how they turned out. Toggles were a contender, but traditional buttons won out in the end.
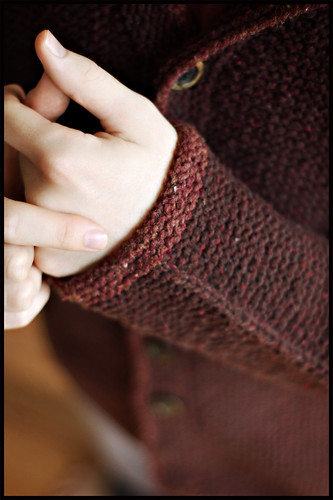
Among the many reasons for which I love this pattern, I really like the options you have for trimming with a contrast color. The 'suspender' strips are a unique feature made possible by those deep, square armholes - I couldn't pass them up. I snagged a contrast color when I placed my order for the wool and just sort of developed the accents as I went. I like the idea of trimming the sleeve cuffs for a little definition. Since the whole thing is in garter, the nice visual weight of cuff ribbing or textured stitches that we usually have when knitting a stockinette sweater wasn't really an option. Contrasting cuffs worked just fine though. I also liked the idea of trimming the entire hood and body with one continuous, thin strip of the contrast color. This is probably my favorite accent of all. I went back and forth on whether or not I thought an I-cord bind-off fit in with the sweater's look. In the end I decided to mimic an I-Cord bind off by working one ridge of garter stitch around the entire body/hood area in the contrast color, then bind off in purl from the RS. I'm really loving how it looks.
The last little accent I wanted to mention are the 'reverse seams.' On the tops of sleeves and 'seams' of the body, I threw in a vertical strip of Slip Stitch Stockinette. In other words, on every WS row I slipped the seam stitch with the yarn forward. This is what creates those neat little ridges running over the shoulder and down to the cuff. Some versions of the Tomten in The Opinionated Knitter have this detail, although I couldn't find it written in any version of the pattern.
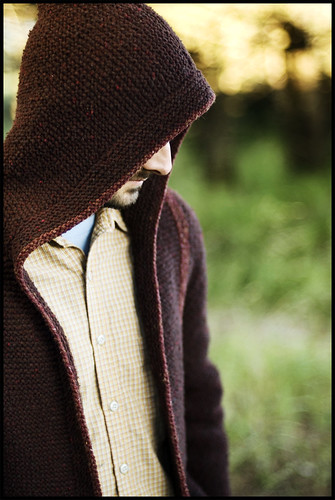
My longest post ever? Probably. There's so much to say about this sweater, I'm impressed if you made it through and I'm sure I've forgotten something. Overall, I couldn't be happier with how it turned out. I turn the A/C on in the apartment just to wear it. It seems I've been meaning to make a hooded sweater for years - I guess I don't need to feel bad about that any longer!
Big thanks to Adrian of HelloYarn for mutually spurning this project into motion (keep your eye on her, she's bound to drop her stunning version on us one of these days soon) as well as to my big bro for modeling the sweater during our Oregon Coast camping trip (the outdoor shots). For those of you wanting to make Tomten your own, feel free to e-mail me with questions. E-mail works better than comments (don't you just love Blogger?). I set up a gallery full of my Tomten pictures here, because there are so many of them! - feel free to peruse. This sweater really is priceless to me at this point so I'd be happy to watch the Adult Tomten Ministry spread!
Onward and upward. ¶ 3:40 PM 206 comments

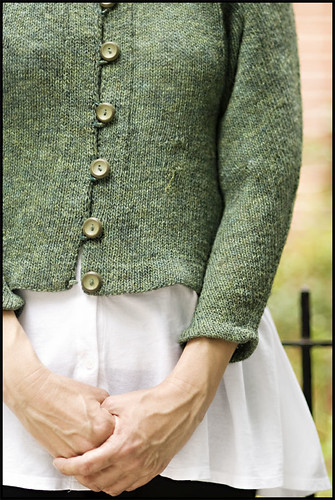
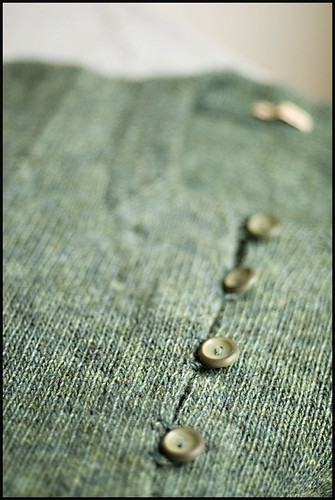
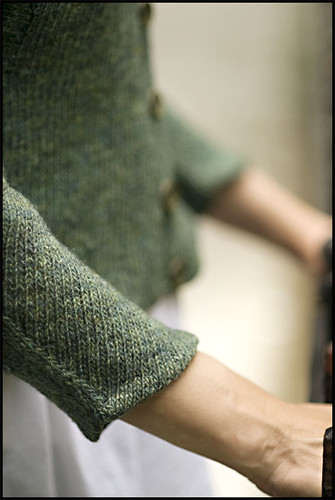
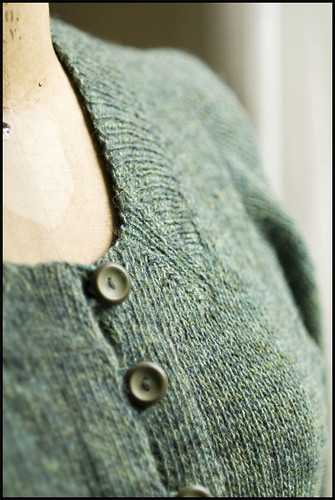
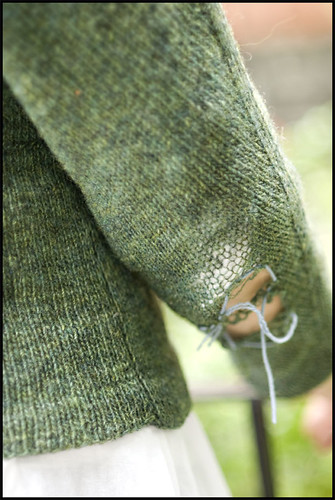
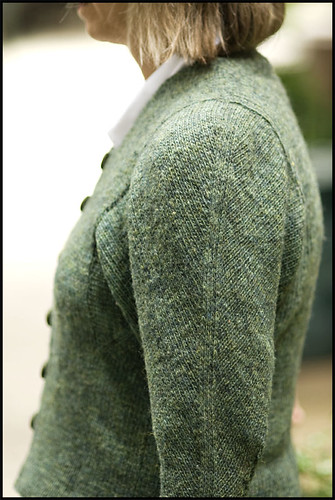
Well it has indeed been an eventful month on my needles. I must say that this has positively been the most exclusive I think I've ever been with my knitting. In retrospect I think that is probably the result of a rare combination of things: just the right balance of freedom and interest from the pattern, an available amount of time for some serious knitting (a luxury!) and a heavy love for the wool involved. Either way, here she is, already for you...
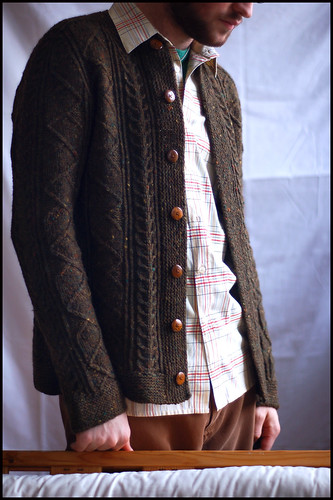
Pattern: Saddle Shoulder Aran Cardigan by Elizabeth Zimmermann/Meg Swansen
Source: Wool Gathering #63 (School House Press)
Materials: Classic Elite Skye Tweed in Spruce Green/1215.
Amount: Twelve and a half 50gm balls. Approximately 550 gms/1300 yards worsted weight
Needles: US8 Circular 32" Addi Turbos. US 7 for sleeve cuffs and garter band at base of sweater
Start Date: 10 March 2007
Finish Date: 9 April 2007
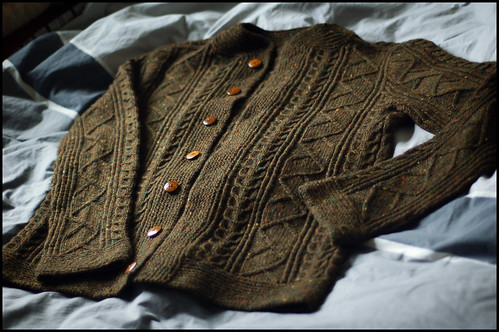
Modifications: When it comes to knitting with Elizabeth Zimmermann, I guess everything is a modification in some sense. Although I guess the word 'modification' implies the presences of a fixed starting point, which we don't have here in Wool Gathering. What we do have, though i a few pages of solid good sense and enough structural advice to get your creative juices flowing.
At the base of this pattern is, of course, EZ's seamless recipe for a saddle shoulder pullover. I've worked many a Zimmermann seamless, but this is the first time I've conquered an official Saddle-Shoulder in its pure form. The fit alone has made me a believer - its a perfect match for those square-shouldered lanky types... ahem.
Of course, it's more than your simple seamless saddle, with a spattering of many a beautiful cable panel and the excitement of that steek - all things that intrigued me to the very end.
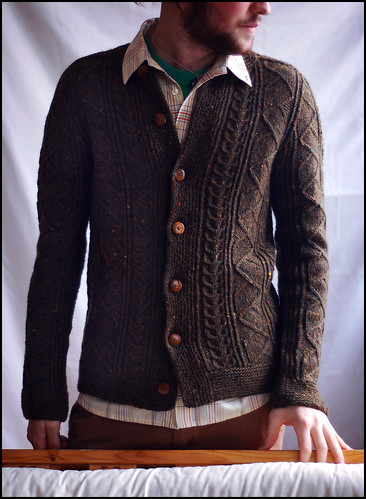
I primarily stuck with the cable advice suggested in the pattern - the Sheepsfold Cables (the ribbon-like traveling stitch panel) and the Fishbone Cables are such classic EZ features that I couldn't resist. Not to mention all the garter. Garter glutton here, and proud to admit it. As for the back panel, it's a slight modification that I ripped off from the magnificent Na Craga pattern by Alice Starmore (the combination of these two knitting gurus was enough to make me all aflutter in the designing stages, it's true). It's a basic horseshoe cable ascending up the center with smaller horseshoe cables mirrored on either side and facing the opposite vertical direction. I really love how it turned out (see below). The underarm panels are a combination of the fishbone and the smaller horseshoe. All these panels together with a bunch of twisted stitch (ktbl) dividers strewn about came together in a great way.
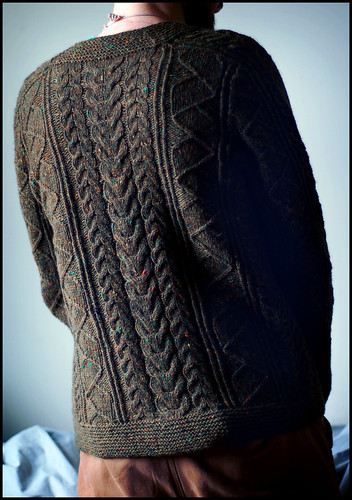
A word on the construction sequence: I did your standard formula of body first, two sleeves, unite at underarms and shape yoke until bind off at collar. The Saddle Shoulder formula leaves a rather square-ish neck, I played this down a bit by shaping the back neck with shortrows. This was totally a freeform operation but did serve well to raise the back neck an inch or so, which was exactly what I needed. After I had the major part of knitting out of the way, I wet blocked the whole thing then cut it into its cardigan form (and rambled non-stop about it. Just check my March archives). After all this I went back and picked up stitches along the base of the sweater with a smaller needle (US7) and worked a 2 inch garter stitch band. Rather than start with this way back at the beginning of the sweater, I liked the idea of picking up stitches after blocking (also I was slightly worried about running out of yarn. The garter stitch base was an option I kept open for that reason). Finally, I worked the button band and collar altogether in garter stitch, mitering the corners at the neck. I wet blocked again just for posterity before sewing the buttons on. To answer some of your questions about the facings - I do plan on sewing them down, solely for the sake of a thorough finish, although I haven't done so yet. The photos you see here feature unsewn facings (not pictured, as they're on the inside of the piece).
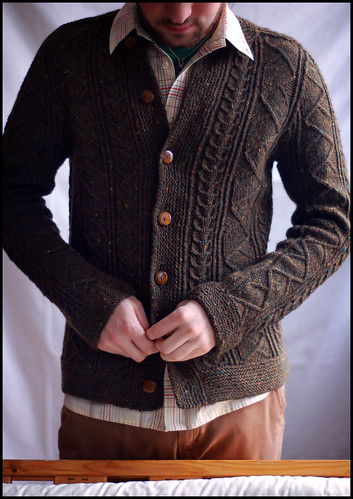
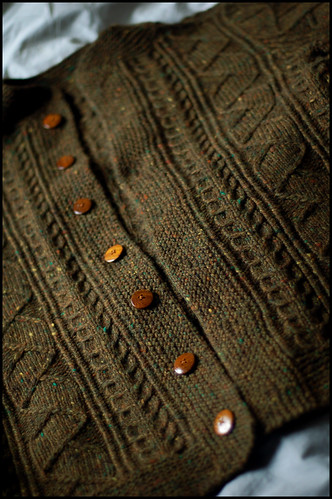
I really dig doing the buttonband this way. I like changing things up a little with a vertical garter stitch band, and its integration with the collar I think also is a unique quality. Working the buttonband vertically also makes it possible to place the buttonholes exactly where they should go, evenly spaced and all, since you know exactly how many total stitches there are from the very first row. Speaking of buttonholes, have you ever tried EZ's one-row buttonhole (explained in KA and KwoT, and I'm sure others)? This is my first time using this method and I'm completely sold. It's brilliant! (Are you surprised, though? really?)
In closing, I felt I should mention that the completion of this sweater has been met with such a mixed bag of feelings for me. Accomplishment and satisfaction surely are first and foremost... but to be honest I sort of feel like someone died. This is the unfortunate curse that plagues the process knitters of the world I guess - but I am acutely aware of the absence of this sweater in my day-to-day routine now. At this point, on such an involved project I would usually be shouting to the hills in excitement for the freedom to move on. There's some sort of postpartum wool withdrawal happening. I guess when you're really in the zone with Elizabeth and Meg, this is par for the course.
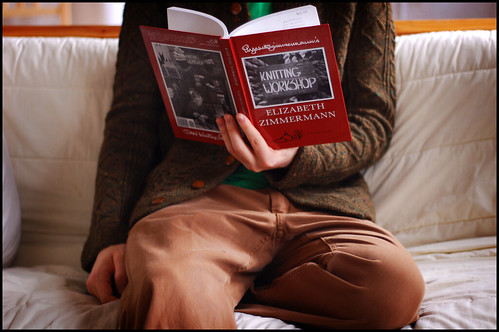
I guess all I can do is go back to the source... give me some more of the good stuff, Liz!
Pattern: Knitted Garter Stitch Blanket in Sheepsdown (Ravelry)
Source: The Opinionated Knitter by Elizabeth Zimmermann
Materials: Cascade Eco Wool (100% undyed Peruvian) #8063; yarn held double
Amount: Just over 9 skeins; approx. 4500 yards, 5lbs (!)
Needles: US13 circulars (although straights will work too)
Finished Dimensions: 80 x 53 inches
Started: October 2007
Finished: May 2008

Here is another example of how far a simple, clever design can go. The pattern originally appeared in Elizabeth Zimmermann's 9th Wool Gathering Newsletter in the Fall of 1962. It is available now in The Opinionated Knitter (a collection of Elizabeth's newsletters) with both the original texts (typewritten and all) and diagrams alongside Meg's present-day suggestions and updates to each pattern.
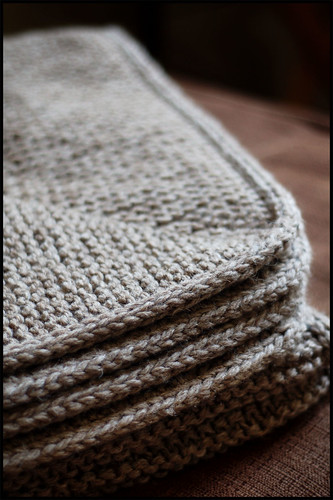
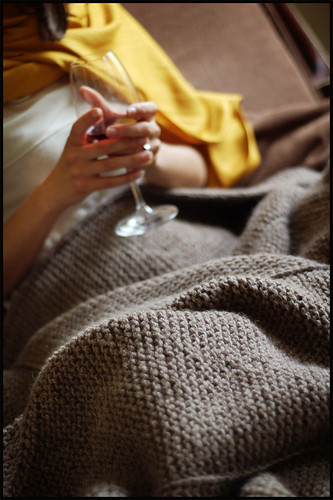
The original pattern calls to be knit in Sheepsdown, Schoolhouse's super bulky, lightly spun, undyed wool. Gorgeous stuff, and I had grand plans of knitting with it before I got economical and turned to my stash to find a plethora of Eco Wool begging for attention. Holding Eco Wool double gave me a bulky gauge (not as bulky as Sheepsdown, but close) and a wonderful squishy, cozy fabric that seemed like a dream to work up a whole afghan with.
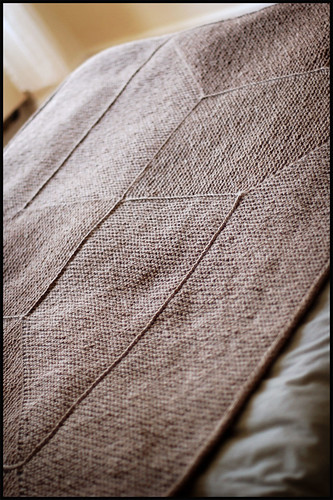
Now, about the simplicity and the genius: the entire blanket is composed of four interlocking pieces, all of equal width, which are formed by simple mitered corners. The beauty, to me, is that throughout the entire process you always have 24 stitches on your needle. Always. And there is nary a purl stitch to be found. Netflix Knitters Dream Project? Yes.
Because my gauge was 3 sts per inch and the pattern calls for 2sts per inch, I upped my stitch count from 24 to 36 in hopes of having a very large, very substantial piece of knitting upon finishing. Another benefit of the design is its complete ease in resizing - because the only shaping involved is a mitered corner and you only have one number to worry about (24sts), you can essentially knit this in any weight of yarn at any size depending on how many stitches are cast on. I think a baby-blanket version in a nice soft DK weight wool would be lovely.
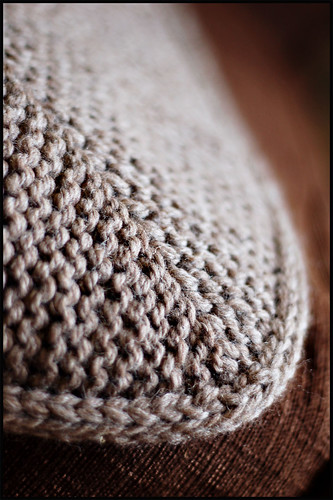
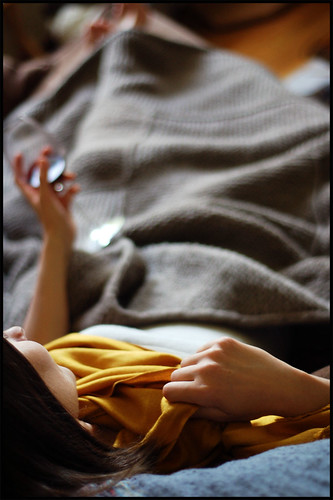
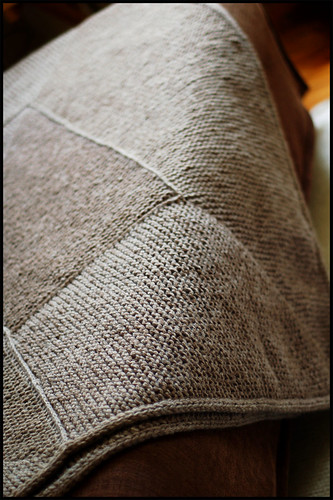
The directional patterning also makes a wonderful texture and a wonderful play with light and shade, as different parts of the whole catch light differently (see photo below). The finished dimensions on mine came out to about 80"x53" - nice and big, and fits perfectly on the surface of a queen-sized bed. Also a favorite for snuggly folks on couches.
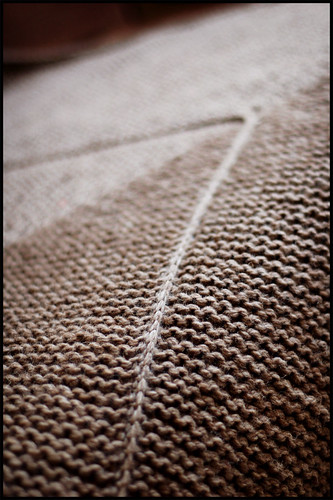
Finishing on this one is a big job and also entails some important decisions. There are many ways to seam up garter stitch, and I tried different methods to see what I liked best. I first tried an invisible garter graft, which looked nice on the RS, but not as nice on the WS, and was too weak in my opinion to hold this beast together. I decided in the end on using a single crochet chain seam to join all the pieces. The crochet seam has some major advantages here: first and most important, because the geometry is strong and completely carries the aesthetic, I wanted a visible seam that accented the construction in a clean way (and had an acceptable WS look). Aside from the aesthetic aspect, a crochet chain is strong and can really take a beating without a flinch. Because this thing weighs about 5 lbs (!) a strong, sturdy seam is essential.
As I mentioned above I trimmed the whole thing with a 3 stitch I-Cord, both for looks and structural help. After all the pieces were sewn together, I knit up one stitch for every ridge and attached the I-Cord all the way around, grafting the first and last row together invisibly.
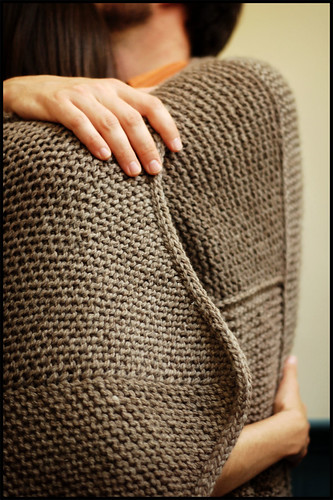
Another quick tip: I recommend a sewn bind-off on all pieces. It keeps the ends of each piece stretchy and matches the cast on (I did a long-tail).
I'm totally enamored and think this is a lifer - good sturdy wool in a good sturdy pattern is sure to hold up for the long haul. I want to thank my models, Ryan and Joelle, for being total champs and swathing themselves in this thing during 96 degree heat without complaint. That's a feat unto itself.
And although you're folded up for summer, dear blanket, when September rolls around again you'll know how truly loved you are. Happy knitting one and all.
Edited to Add: Oops! Looks like I forgot to take a picture of the beast in its entirety! Had to strap on the wide-angle lens and clear out the living room... but I got it. You can see the full shot here.
¶ 1:10 PM 102 comments
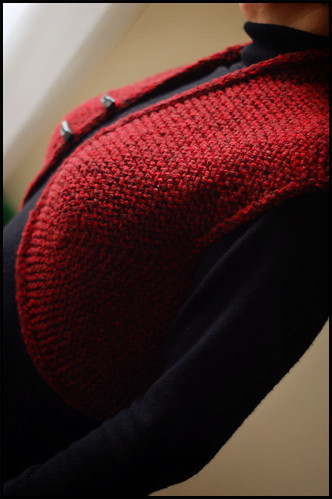
It's another classic Elizabeth Zimmermann pattern to add to the ever-growing collection I've started.
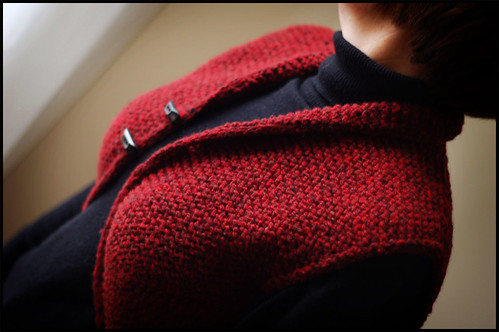
Source: Knitting Workshop
Yarn: Rowan Scottish Tweed Chunky in "Lobster"; 3 skeins
Needles: US 10.5/6.5mm KnitPicks Options Circulars
Buttons: 2 black marbled toggles from M&J Trimming
Started and Finished: Late last summer (planning ahead is rare, but awesome)
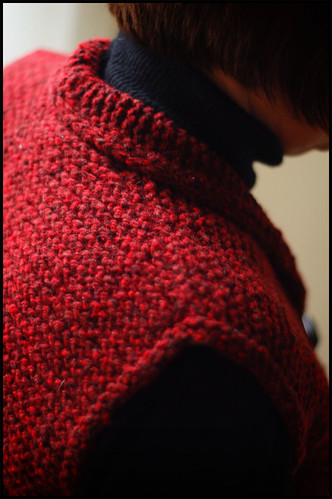
Modifications: The original pattern is written for worsted weight but I really had my heart set on using this chunky red tweed that I had in my stash. I did some pretty simple calculations to change the counts for a thicker yarn although in retrospect I think the vest would be pretty nice as-written with a chunkier yarn. My mom is a tiny little woman so this fit her perfectly, but I don't think the modifications made a huge difference for the intended size since the chunky yarn needs more ease than worsted anyway.
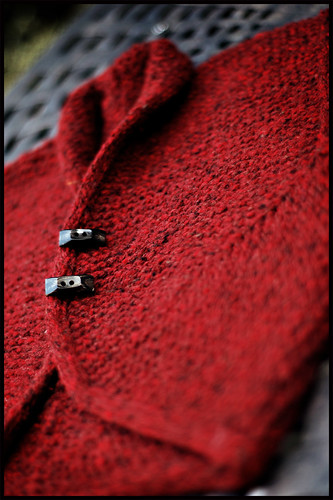
I trimmed the whole thing with I-cord and tried invisible I-cord buttonholes a la EZ which are really fun. The vest is knit in two pieces - the right side and left side (this was the predecessor of Elizabeth's "Rorschach Sweater") and seamed up the back after knitting (see picture below). All shaping is done using short-row-style mitered corners and as usual its all garter stitch, which means no purls allowed.
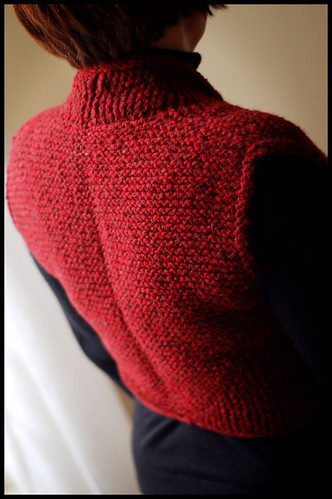
This is a quick knit - great for gifts if you've already exhausted someone with hats or scarves over the years. Also, this piece technically fits in the sweater category... so you'll get extra brownie points for that. In true EZ fashion the pattern is so clever that it's sure to keep you interested all the way through, even on a deadline.
I have three days of trials left and then we're hopping on a plane and flying far far away from The Big Apple. Here's wishing you minimal stress over the next 10 days. I'm shooting to have one more sweater for you before Christmas - stay tuned!
¶ 1:08 PM 58 comments
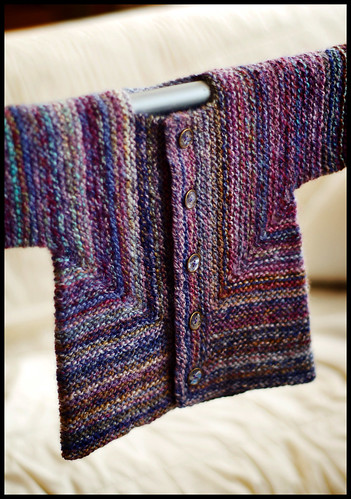
Author: Elizabeth Zimmermann
Source: The Opinionated Knitter, Knitting Workshop
Gauge: 5 sts per inch
Materials: Hello Yarn Handspun 2-Ply
Colors: "Trodden" and "Hunkered"
Amount: 5.3 ounces/306 yds
Buttons: 5 Iridescent Shell buttons from M&J Trimming in midtown Manhattan; Five
Started: 7 June 2007
Finished: 9 June 2007
(Buttons Added 17 June 2007)
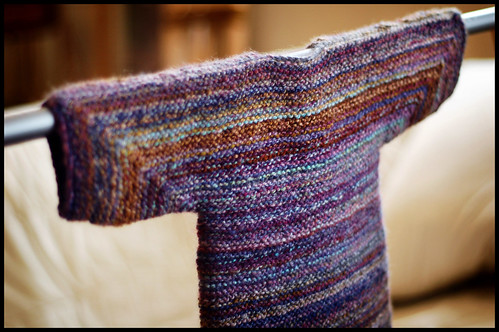
I did this one pretty much exactly by the book - no modifications. I familiarized myself as best I could with just exactly what is going on with this pattern, and while I felt I was able to grasp the concept well enough - you really don't get it until you do it. And do it again. This one is addictive!
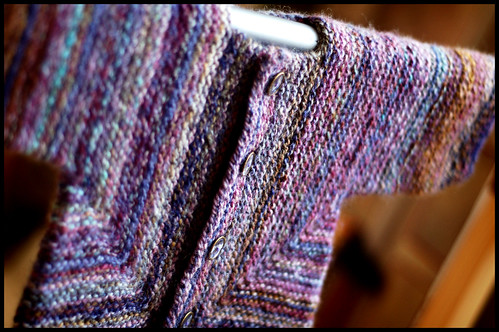
Aside from the inspired pattern, joining it with such a special yarn really made this experience priceless. I knit this on the train ride up to Rhinebeck a few weekends ago. With the Hudson gliding by outside my window, I had one of those elevated knitting moments where everything comes together a little too well.
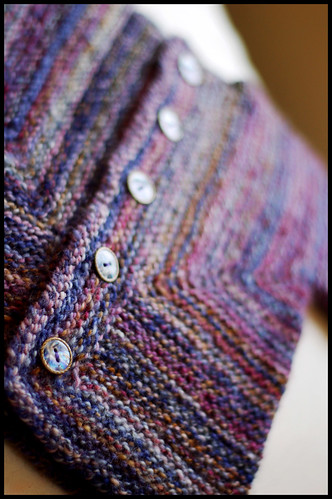
The buttons were a perfect match - they're shell buttons that reflect all the blues and purples of Adrian's handspun. I originally planned on something a little more earthy, but when I saw these I changed my mind. I default to wood buttons too often anyway.
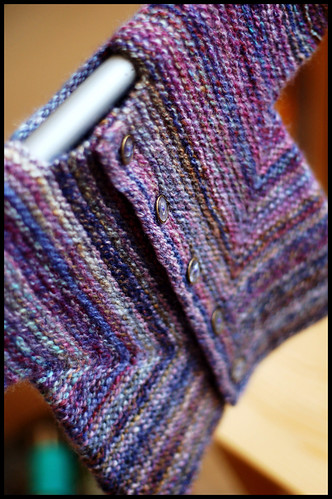
I'm stating the obvious, but this one gets a big, fat stamp of approval from me. I've already started scheming future versions from some of my more exciting stash bits.
We're headed out to the Oregon Coast to camp for the next few days (!!!) so I'll be away from e-mail. Despite being on vacation, I did recognize that this morning is Monday, which is usually not fun at all - I hope this little BSJ Offering rounds out the edges of the week jolting you back into reality. Happy Knitting!
¶ 1:04 PM 82 comments
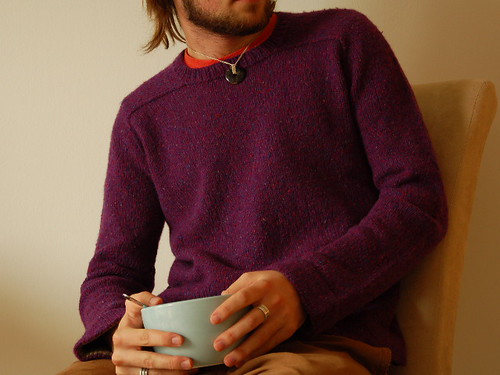
Source: Knitting Without Tears
Materials: Rowan Yorkshire Tweed DK in 'Revel' (1o Balls); Rowanspun DK in 'Rush' (less than 1 ball) for hem facings.
Needles: US 6 Clover Bamboo Circulars (29" & 16"); US 6 Crystal Palace Bamboo DPN's
Cost: $49.99 (scored a bag of Yorkshire Tweed on Ebay) + Shipping
Start Date: 26 July 2006
Completion: 18 August 2006
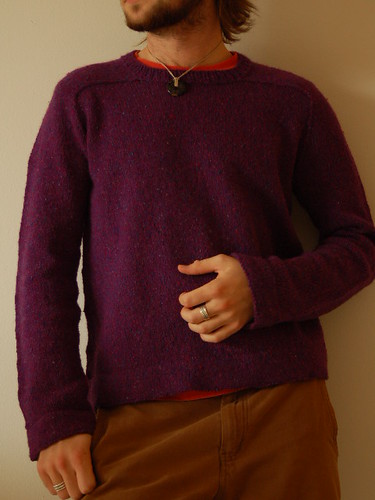
I'll do my best to explain the construction on this one. The (pure) genius lies in the simplicity. Again, I realize I'm preaching to the choir here...
Anatomy: EZ offers up 4 recipes for seamless sweaters in "Kw/oT." With the exception of yoke construction, all 4 sweaters are done in the same way. You knit the body in the round (in my case, a straight tube with no shaping), followed by two sleeves (beginning at the cuff, increasing up to the desired circumference as you approach the armhole). These three pieces are knit seperately until you've reached a preferred length. This part of the sweater was sort of a snooze-fest, but I love me some stockinette in the round, so I enjoyed it. It also goes crazily fast.
When all three pieces are completed, you join each onto one 29"+ circular needle and work one long round to join them all together (having left of 8% body circumference for the underarm on each piece) - this is the longest round you will work. From this point, you choose a yoke treatment and get to the good stuff!
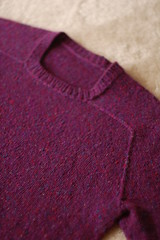
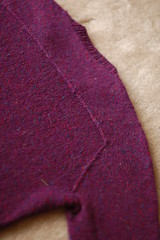
The Seamless Hybrid is a tasty mixture of a standard raglan and a saddle-shoulder pullover. Work the first portion of the yoke with standard raglan decreasing, although, because we're working in the round, we can decrease at a rate of every third row (rather than every second or fourth) which gives the IDEAL raglan slope, and starts securing that wonderful fit. After a certain number of stitches have been decreased, its time to saddle up. From here on out, you will be working just the sleeve stitches back and forth, making a saddle that slowly approaces the center neck, leaving the body stitche s live on the needle. How is it seamless? As you work the saddle, you knit the last stitch of each row TOGETHER WITH ONE LIVE STITCH OF THE BODY. You are seaming up the top of the piece as you build it.(Seriously, I'm excited just explaining it). When you reach the collar - you bind of half of the stitches of the saddle and continue working them across the back. This means the neck hole is merely the front half of the sleeve saddle, in the center of the sweater. When both saddles meet in the middle, you kitchener graft them together and BAM, your sweater is all seamed up. Pop a collar on that bad boy and you're ready-to-wear.
(I realize that this description may be convolluted and confusing (much like the pattern writing!) I had to read and re-read multiple times to envision it correctly. If your having trouble, just make one, it'll all make sense to you then)
Below I have included visuals of the yoke construction (Click on them to see them in greater detail):
front of yoke :: back of yoke
Modifications/Personalization:
How do you make it your own? Well, first off - any sweater you make from such a general recipe will be indiviudalized based on your yarn choices: guage, drape, shaping, blah blah blah. Its the same old story. I chose to add a wide (about 2") turned hem at the sleeve and body cuffs. I liked how this added a little weight to the bottom half of the piece. It also gave me an opportunity to add a contrasting color on the hem facings.
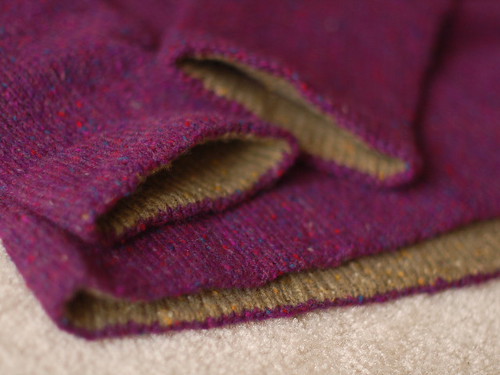
Recognize it? Thats a little leftover Rowanspun DK from this. I like the semi-off-the-wall color combo, and the union of tweeds. (Is there any better union?)
Some of you asked about how I did this, and its a suuuuper simple process: With contrasting yarn (Rowanspun) provisionally cast-on 90% the number of stitches you plan on having at the base of your sleeve. Knit these stitches to desired cuff length (2"). Knit one round with Main Yarn (Yorkshire Tweed), increasing evenly up to 100% of cuff circumference. Purl one round (this is your turning round). Now begin to knit normally with your Main Yarn. When you have knit the equal length with your Main Yarn that you had previously done with your Contrasting Yarn (2"), it is time to join them together: Fold the hem and begin your round, knitting two stitches together on every stitch (one contrasting yarn stitch, and one main yarn stitch). Keeping with the whole "seamless" theme, we are bypassing the insanely annoying step of sewing down hem facings (cringe). *NOTE: you are knitting together 10% more Main Yarn stitches than Contrast Yarn Stitches... you will need to calculate for this and skip a K2tog every once in a while (you'll only knit the Main Color by itself).
EZ suggested finishing with a hemmed collar as well - which was my original plan. However, when I did this it looked rotten. It really didn't fit. So I went with a 1x1 ribbed collar and a tubular (kitchener) bind off (i love how clean that one is). I like the finished product
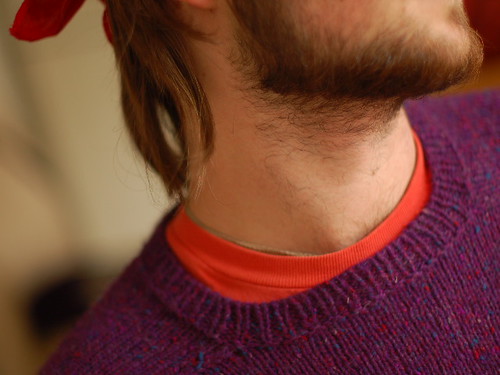
And for the record, this is my best fitting garment yet - I really like how it feels, and post blocking, my wool-too-scratchy worries were soothed, its definitely wearable! I've been sportin it around in this rainy Chicago weather for 3 days already
and its back to knitting.
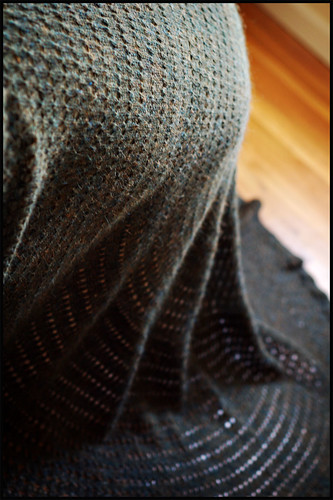
Source: Knitter's Almanac (July)
Materials: Ístex Plötulopi Unspun Icelandic Wool; just uner 6 wheels (1800 yards)*
Needles: 36-Inch US 8/5.0 mm Addi Turbo Circulars
Dimensions: 78" diameter after blocking; 64" diameter unblocked
*See bottom of post for additional details on yarn and blocking
Start Date: 19 October 2007
Finish Date: 9 January 2008
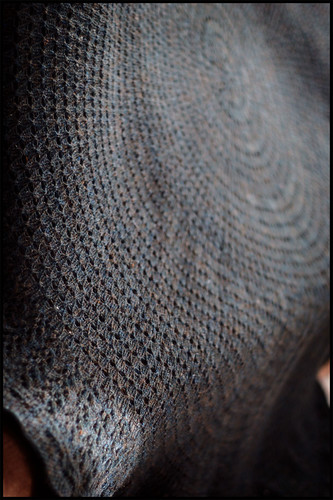
Notes on the pattern: Of all the many genius ideas of Elizabeth's, to me, the Pi Shawl is one of the most mind-blowing. If you aren't familiar with the pattern I urge you to read it, for the pure enjoyment of how clever it is in all its glorious simplicity. Worked from the center out, the entire piece has no more than 6 (or 7 in my case) increase rounds total - meaning 99% of this shawl is straight knitting (save whatever lacey embellishments you'd like to incorporate) which gets major points in my book.
The other beautiful thing about the Pi Shawl is its endless potential for individuality. Spend a little time trolling the web for completed Pi Shawls (there are hundreds) and you'll see what I mean. The beauty of the pattern is it's blank-canvas-like nature - consecutive rings of set stitch counts (144, 288, 576, etc.) which just beg you to plug in any old lace motif that's giving you an itch.
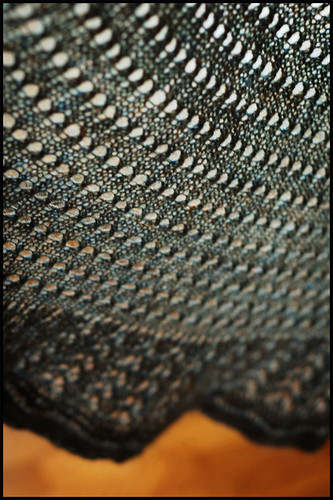
If you aren't feeling all that creative, or have your heart set on one of the versions EZ suggests (like I did) - that's just fine too. There are two beauties already laid out for you in both Knitter's Almanac and Knitting Workshop. I have always loved the straight forward and classic beauty of the 'consecutive YO ring' version and knew that I wanted to give it a go. This is basically a stockinette circular shawl with a *YO, k2tog* round thrown in every 6th row. I love how these "sham rows" completely camouflage the actual organic increase rounds. The shaping is invisible in the entourage of lace rings. So great!
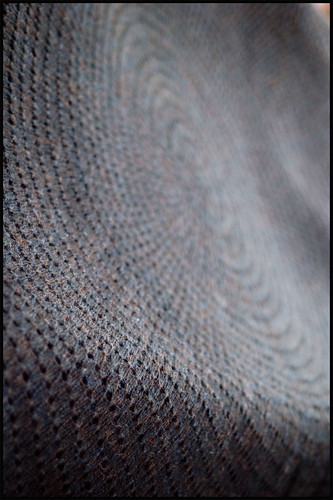
Elizabeth talks about how there is never a need to increase beyond the 576 stitch section, as the shawl will already be nice and big (she says something about not having a need to cover a football field?). I had a lot of yarn though, and really wanted to see how far I could push this, with the ultimate goal of having a big blanket for the couch. My calculations showed that I would have enough wool for about 22 rows into the 1152 stitch section (oh the horror), plus an attached (9-stitch) garter side-to-side edging.
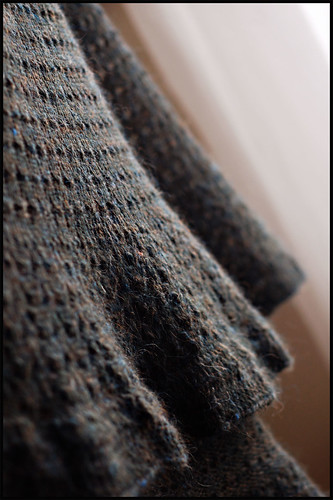
The most miraculous part of the whole process is probably that I was able to keep a treacherous number of stitches on a 36" circular needle. It got a little rough on my hands towards the end, but when that frantic finishing fever comes over you just about nothing can stand in your way, right? Having a huge round of knitting on a circular needle also makes it impossible to predict just how big the piece will be. Before working the edging, you have nothing more than a big rumpled sack of holey wool sitting in your lap that looks more like an oversized rasta cap than a lace blanket. Some days it took all my control to keep from bucking my calculations and indulging in the bind-off, just to be able to free the lace from the needles.
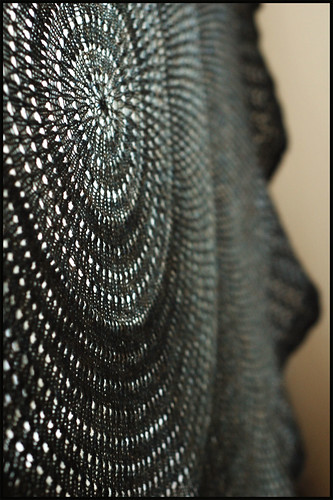
The edging of the shawl is the only section that got a little bit of fancy lace (not that fancy, but relatively). I think a little hint of laciness around the edge makes the simpler ring pattern really shine. After my final increase round I switched into a gull stitch pattern and worked 5 vertical repeats around before starting the attached garter stitch edging aaaaall the way around.
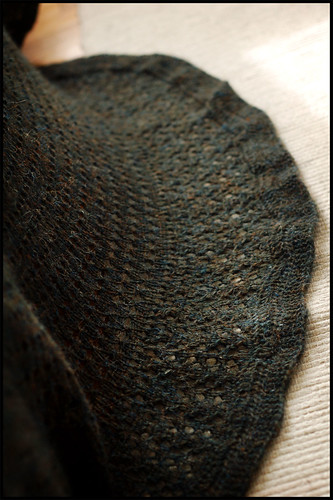
Some notes on yarn: Unspun Icelandic is a wonderful, wonderful thing. If you're a fan of wooly things, you must get your hands on some (I received mine as a gift from a friend in Iceland, but you can purchase it online through Schoolhouse Press). Don't get me wrong, this isn't a yarn you're gonna want around your neck - it's a far cry from merino - but it has its own unique qualities that I could go on and on about. First of all, because it's an unspun, long-stapled wool, it's as light as air and very warm. Even in a thin piece of lace full of holes, it works surprisingly well at trapping warmth. The blanket is huge and light and toasty -exactly the combination I was looking for. The other benefit is the yardage. Each wheel seems to go on and on and on - I made a blanket that covers a queen sized bed with less than 6 wheels of the stuff (it's about 300 yards to 3.5 oz) on a US 8.
And if you fear knitting with something so "delicate", you can get rid of that idea straight away. The wool staple is longer than the distance between your needle and your fingers, so while knitting it feels just like any other yarn, and if it does break coming out of the skein (rarely happened, unaided by dogs or human feet) it's no problem. The yarn sticks to itself like velcro - so to join a break just overlap about 2 inches on each end and knit right past it. That's the other bonus - no ends to weave in, and no spit splicing necessary. It's like knitting an 1800 yard cone - carefree and seamless. And to dispell any rumours, the knitted fabric is just as strong as any other yarn out there on the market.
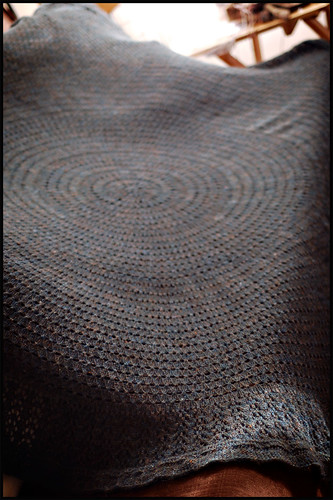
I guess this counts as my first official finished knit of 2008. It's already taken some serious self-control to keep myself from purchasing more of this wool (the natural colors are amazing) and cast on for another. It became an immediate crowd-pleaser in my home, so another one might not be such a bad idea.
Edited to Add: The following information has been added to the post in response to questions I've received via e-mail about this project. I hope they are helpful.
First, more specifics about the color of the wool. I received this yarn as a gift from a friend in Iceland. She purchased the yarn there in person. Schoolhouse Press does sell this yarn, but in a limited palette - which I should have mentioned earlier - and does not currently carry the color that I used.
The color of my wool is titled Sea Green Heather and listed as product #1422 on the Istex official color card - viewable here. You'll notice they have a lot of wonderful colors! Don't say I didn't warn you.
In researching, we think that the best bet for possibly acquiring this yarn by mail order would be the Handknitting Association of Iceland, but can't say for sure. All of their contact information is available behind the link. NOTE: it seems that the colorcard listed on their site is an older version and sites Sea Green Heather as #9736.
Blocking: Yes, blocking was quite a challenge in our hardwood-floored, tiny apartment. I was hoping to be able to block the shawl on the queen-sized bed but realized very soon that this would not be possible. After some creative brainstorming, we tried a rather unconventional but nonetheless effective way of blocking - involving the box spring. The picture says it all.
And finally - a few of you asked if I worked with the unspun Icelandic wool single stranded or held it double stranded. I worked single stranded. ¶ 11:12 PM 126 comments